Difference between revisions of "How to Store Images in MIRC - an Introduction to the File Service"
m (Protected "How to Store Images in MIRC - an Introduction to the File Service" [edit=sysop:move=sysop]) |
|
(No difference)
| |
Latest revision as of 19:18, 31 July 2009
This article is a shorthand guide for storing and managing images and files on the MIRC File Service. The File Service provides each MIRC user with a personal file cabinet in which files of any kind can be stored for later retrieval or for insertion into teaching file documents through the Author Service. Files in a personal file cabinet are private and cannot be accessed by other users. In addition to the personal file cabinets, the File Service also provides a shared file cabinet which serves as a common location for sharing files with other users and for receiving DICOM images from a PACS, workstation, or modality.
1 Prerequisites
To use the MIRC File Service, you must have an account on the MIRC site. See your MIRC site administrator, who will create an account with the user role for the file service. To use the File Service for creating MIRC documents, you must also have user and author roles on a storage service on the MIRC site. Your account will consist of a username and password which you will use to access the system.
2 Accessing the File Service
To access the file service, launch your browser, go the MIRC site's query page and log in. Click the File Cabinet button on the left side of the page.
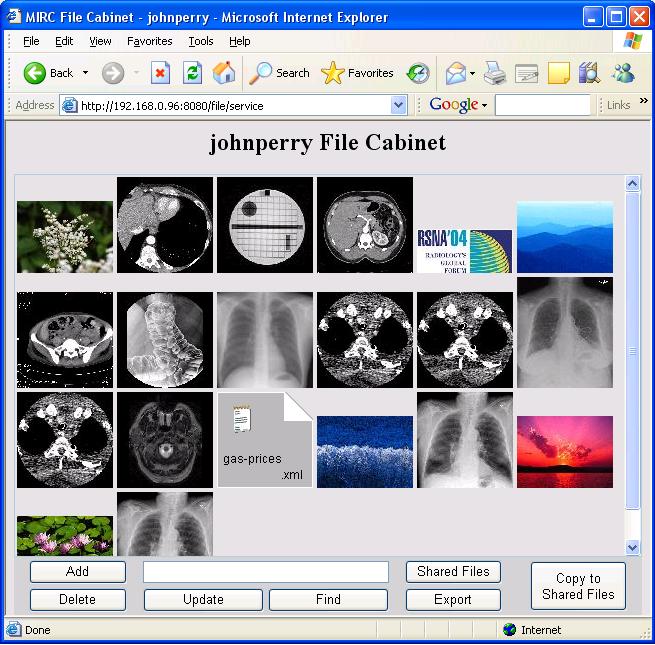
The file service will then display a page showing icons for all the files you currently have in your file cabinet. At the bottom of the page is a small control panel.
3 Adding Files to a File Cabinet
To add files to a file cabinet, click the Add button in the control panel. The file service will display a dialog window allowing you to browse to a file and send it.
Tip: If you have a lot of files to upload, you can put them in a zip file with your favorite zip utility and just upload the single zip file. The file service will unpack the zip file and install each of the files in the file cabinet.
4 Selecting Files in the File Cabinet Window
To select a single file, click its icon. The icon will show a red border to indicate that it is selected. If you have stored any keywords with the file (see Using Keywords below), the keywords will be displayed in the text area in the control panel.
To select multiple files, hold the control key down while clicking. If a file is already selected and it is clicked with the control key held down, it is deselected.
To select a sequence of files in a row, select the first file, hold the shift key down and select the last file.
To deselect all files, click on an empty area in the window.
5 Deleting Files from a File Cabinet
To delete files from a file cabinet, select the files and click the Delete button.
6 Using Keywords
If you have any files selected, you can enter text in the text area in the control panel and then click the Update button. The text will be associated with all the selected files.
If you enter text in the text area and click the Find button, all files with keywords containing that text will be selected.
Note: When finding files, the keyword text is not case-sensitive. If a file has the keywords Abraham Lincoln and you search for abr, the file will be found.
7 Exporting Files from a File Cabinet
If you select one or more files and click the Export button in the control panel, the file service will place the files in a zip file and download it to your browser, which will give you an opportunity to save or unpack the zip file.
If you double-click a file in a file cabinet, the server will download the file to the browser, using a content-type which is appropriate for the file. If the file is an image whose content-type the browser can display, the image will appear; otherwise, the browser will offer to save the file.
The file cabinet has a special feature for DICOM images. If you hold down the Alt key and double-click a DICOM image, the server will return a page listing the DICOM elements in the image.
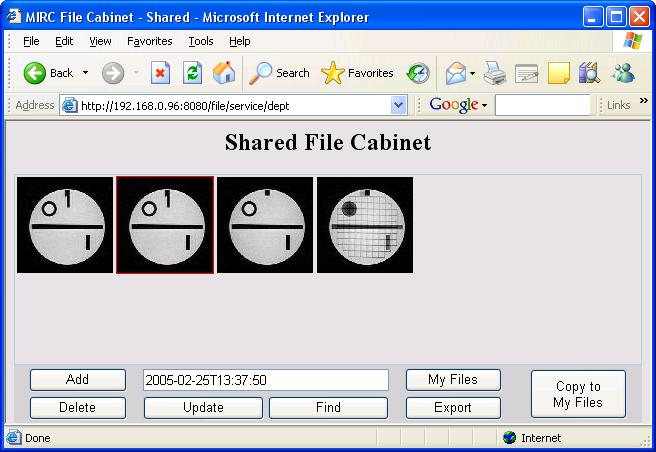
The file service provides a shared cabinet that can be accessed by clicking the Shared Files button in the control panel. When viewing the shared file cabinet, the button text changes to My Files and clicking it will return you to your personal cabinet.
Files may be copied in either direction between your personal file cabinet and the shared file cabinet by selecting the files and clicking the large Copy to... button on the right side of the control panel.
Files may be added directly to the shared file cabinet with the same procedure used for adding files to your personal cabinet. When files are placed in the shared cabinet, the user who placed them there is identified as the owner of the file, and although any user can access the files and copy them to his personal file cabinet, only the owner (or the MIRC administrator) is allowed to delete them.
The shared file cabinet also has a DICOM Storage SCP which can receive DICOM objects from workstations, modalities, and PACS. When objects are received by the SCP, they are assigned no owner, so only the administrator can delete them. They are automatically assigned a keywords field containing the date and time they were received.
Any comments or suggestions for improvement are appreciated. Please visit the RSNA Forum Site, select the MIRC main forum and add a thread to the User Comments, Questions, and Answers forum.

